- Call Us: 0717044443 / 0739255050 / 0725021709
- Email: info@suimas.co.ke / info@interiordesigners.co.ke

- Description
Description
Tray Gypsum Ceiling Designs
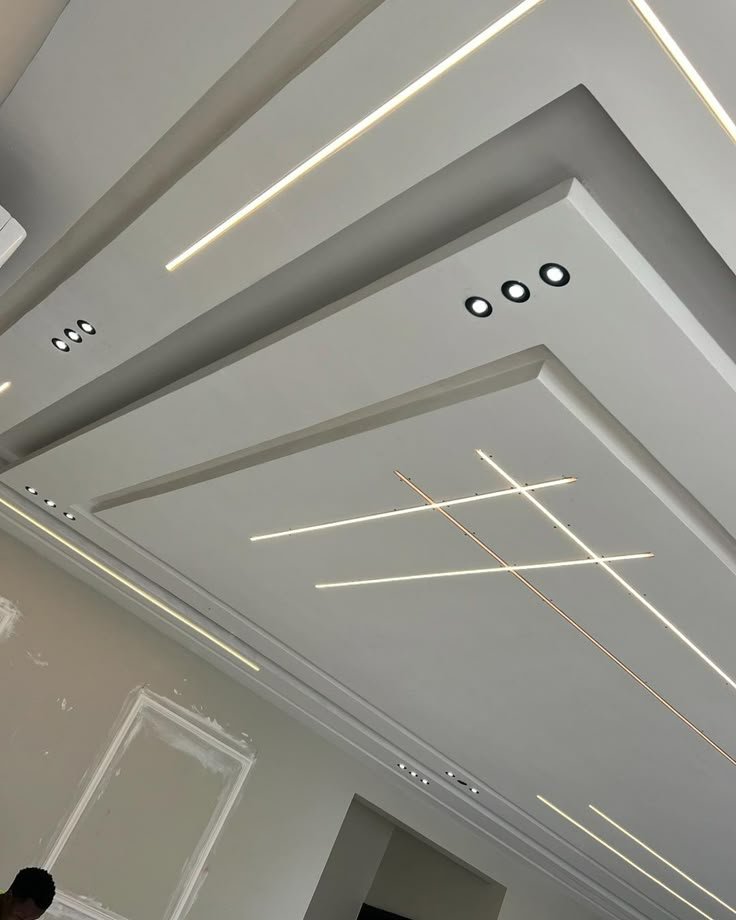
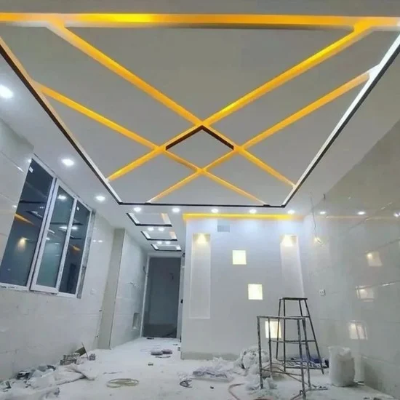
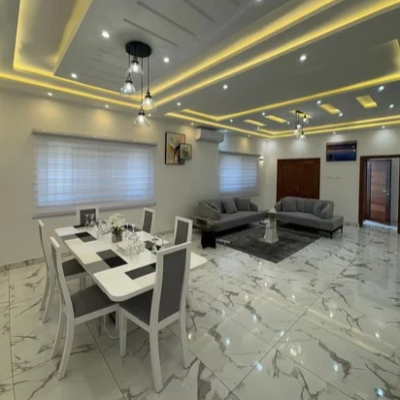
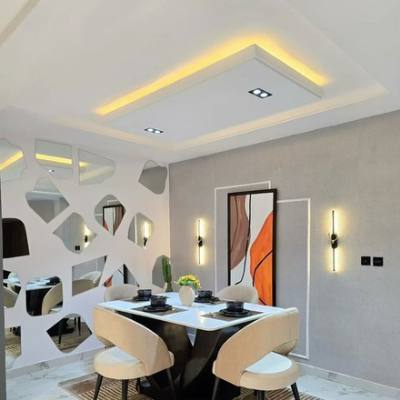
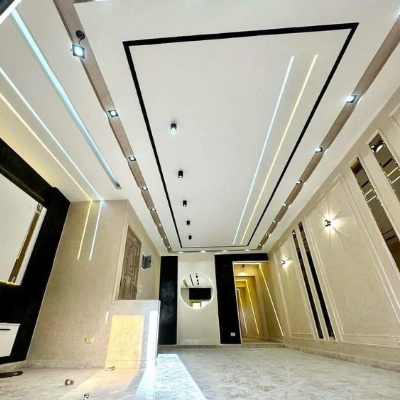
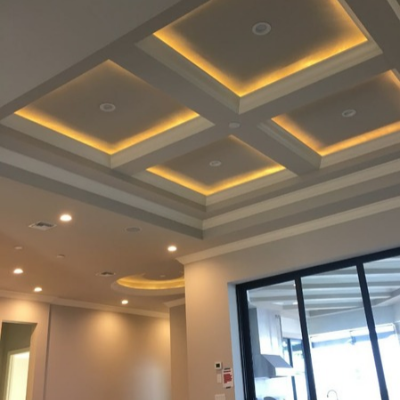
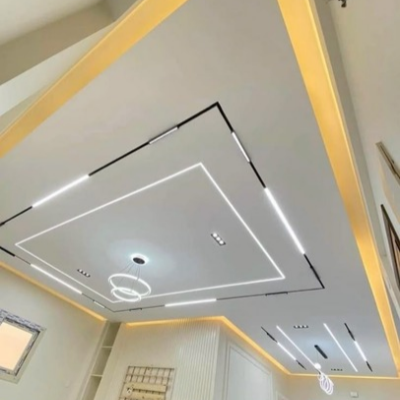
Tray gypsum ceiling designs are a popular choice for homeowners who want to add depth, elegance and modern style to a room without covering the entire ceiling with complicated patterns. A tray ceiling features a recessed central section surrounded by a raised or dropped border, creating a framed appearance that can work with concealed LED lighting, recessed spotlights, pendant lights or a simple painted finish.
At SUIMAS Interior Designers, we help homeowners, developers and businesses choose tray gypsum ceiling designs that suit their rooms, preferred finishes and budgets. Whether you are upgrading a living room, designing a master bedroom, finishing a maisonette or improving a commercial interior, the right tray ceiling can give your space a coordinated and professionally finished appearance.
This guide explores different tray gypsum ceiling designs in Kenya, their applications, indicative installation costs, lighting options, material considerations and practical tips for planning your project.
What We Offer
SUIMAS provides gypsum ceiling design and installation services for residential and commercial properties.
- Tray gypsum ceiling designs for living rooms, bedrooms, dining rooms and selected commercial spaces.
- Gypsum ceiling installation services covering ceiling framing, gypsum board installation, joint finishing and painting.
- Single-tray and double-tray ceilings designed around room dimensions and architectural details.
- Concealed LED and recessed lighting coordination to improve the appearance and functionality of the ceiling.
- 3D design and layout planning to help you visualise your ceiling before installation.
- Ceiling renovation and finishing for existing properties undergoing interior upgrades.
- Residential and commercial interior design for projects where the ceiling must coordinate with lighting, flooring, furniture and other finishes.
Our goal is to help you choose a design that looks good, works for your space and fits your project budget.
Why Choose Tray Gypsum Ceiling Designs?
A tray ceiling adds visual depth while keeping the central area of the ceiling relatively simple. Rather than relying on many decorative shapes, it uses a recessed centre and a surrounding border to create a distinctive architectural feature.
1. They create a framed ceiling appearance
The tray’s central panel draws the eye upward, giving the ceiling a more defined appearance. A rectangular tray can complement the straight lines of contemporary furniture, while a square tray can work well in rooms with balanced proportions.
2. They support attractive lighting arrangements
A tray can accommodate suitable concealed LED strips, recessed spotlights or a central decorative light. The lighting can make the ceiling feel more prominent without requiring excessive decoration.
3. They suit several interior styles
A tray ceiling can look modern with a slim border and warm lighting. It can also suit a more traditional interior when combined with cornices, decorative mouldings or a central light fitting.
4. They can define areas in open-plan rooms
In an open-plan living and dining area, a tray can visually frame the sitting area or dining table. This provides subtle definition without necessarily requiring a physical partition.
5. They allow different levels of decorative detail
You can choose a straightforward single tray or a more elaborate design with multiple levels, contrasting paint and concealed lighting. This flexibility allows you to control both the appearance and the installation budget.
Popular Tray Gypsum Ceiling Designs in Kenya
Tray ceilings are available in different shapes and finishes. The best option depends on the room’s dimensions, available ceiling height, lighting requirements and the style of the interior.
1. Simple Single-Tray Gypsum Ceiling
A single-tray gypsum ceiling features one recessed central section surrounded by a raised or dropped perimeter. It creates depth without the complexity of several overlapping levels.
This design is suitable for homeowners who want something more distinctive than a flat ceiling but do not need elaborate ornamentation.
Best for: Living rooms, master bedrooms, dining rooms and modern apartments.
Design tip: Keep the border proportional to the room. A wide border may overwhelm a compact space, while a very narrow border may not create the visual effect you want.
2. Double-Tray Gypsum Ceiling
A double-tray ceiling introduces two levels of framing or recesses. Depending on the layout, the second level may sit inside the main tray or form another surrounding border.
It creates a stronger visual feature than a single tray and can support more detailed lighting arrangements. However, it generally requires additional framing, boardwork and finishing.
Best for: Spacious living rooms, large master bedrooms, villas and selected hospitality interiors.
Design tip: Use a clear hierarchy between the levels. Too many narrow steps can make the design look crowded instead of elegant.
3. Tray Gypsum Ceiling with Concealed LED Lighting
This design incorporates a lighting channel around the tray. The LED strip remains hidden from direct view, allowing light to reflect onto the ceiling or surrounding surfaces.
It works particularly well when you want a softer evening atmosphere without relying entirely on bright central lights.
Best for: Living rooms, bedrooms, lounges and dining spaces.
Design tip: Plan the position of the LED strip and its power supply before the gypsum boards are installed. The design should also allow for maintenance access to electrical components where necessary.
4. Floating Tray Gypsum Ceiling
A floating tray uses carefully placed recesses and concealed lighting to create the visual impression that the central ceiling section is separated from the surrounding border.
The appearance depends on the depth of the recess, the shape of the tray and how the light is distributed.
Best for: Contemporary living rooms, modern maisonettes, master bedrooms and premium residential interiors.
Design tip: Make the lighting channel consistent around the tray. Uneven gaps or poorly positioned LED strips can spoil the floating effect.
5. Rectangular Tray Gypsum Ceiling
A rectangular tray follows a long rectangular outline. It often works well in living rooms that have an elongated shape or furniture arranged around a main seating area.
The design can include a central pendant, recessed spotlights or concealed perimeter lighting.
Best for: Long living rooms, dining rooms and open-plan interiors.
Design tip: Align the tray with the room’s major architectural lines. Where possible, consider the location of windows, doors and furniture before finalising the design.
6. Square Tray Gypsum Ceiling
A square tray provides a balanced appearance in rooms with relatively equal length and width. It can create a strong central feature while keeping the surrounding ceiling simple.
You can use it with a central light, recessed spotlights or a concealed LED channel.
Best for: Square living rooms, bedrooms, dining areas and selected reception rooms.
Design tip: Confirm that the tray is centred correctly in relation to the room rather than assuming the room’s geometric centre will always match the furniture arrangement.
7. Tray Ceiling with Recessed Spotlights
This design combines a recessed central panel with carefully positioned spotlights. The fittings can provide general illumination or highlight selected areas, depending on the lighting plan.
The design does not need a large number of lights. The objective is to provide sufficient, comfortable illumination while maintaining a clean ceiling appearance.
Best for: Living rooms, bedrooms, offices and meeting rooms.
Design tip: Decide on the spotlight positions before installation. Check glare, spacing and the relationship between the fittings and the tray’s borders.
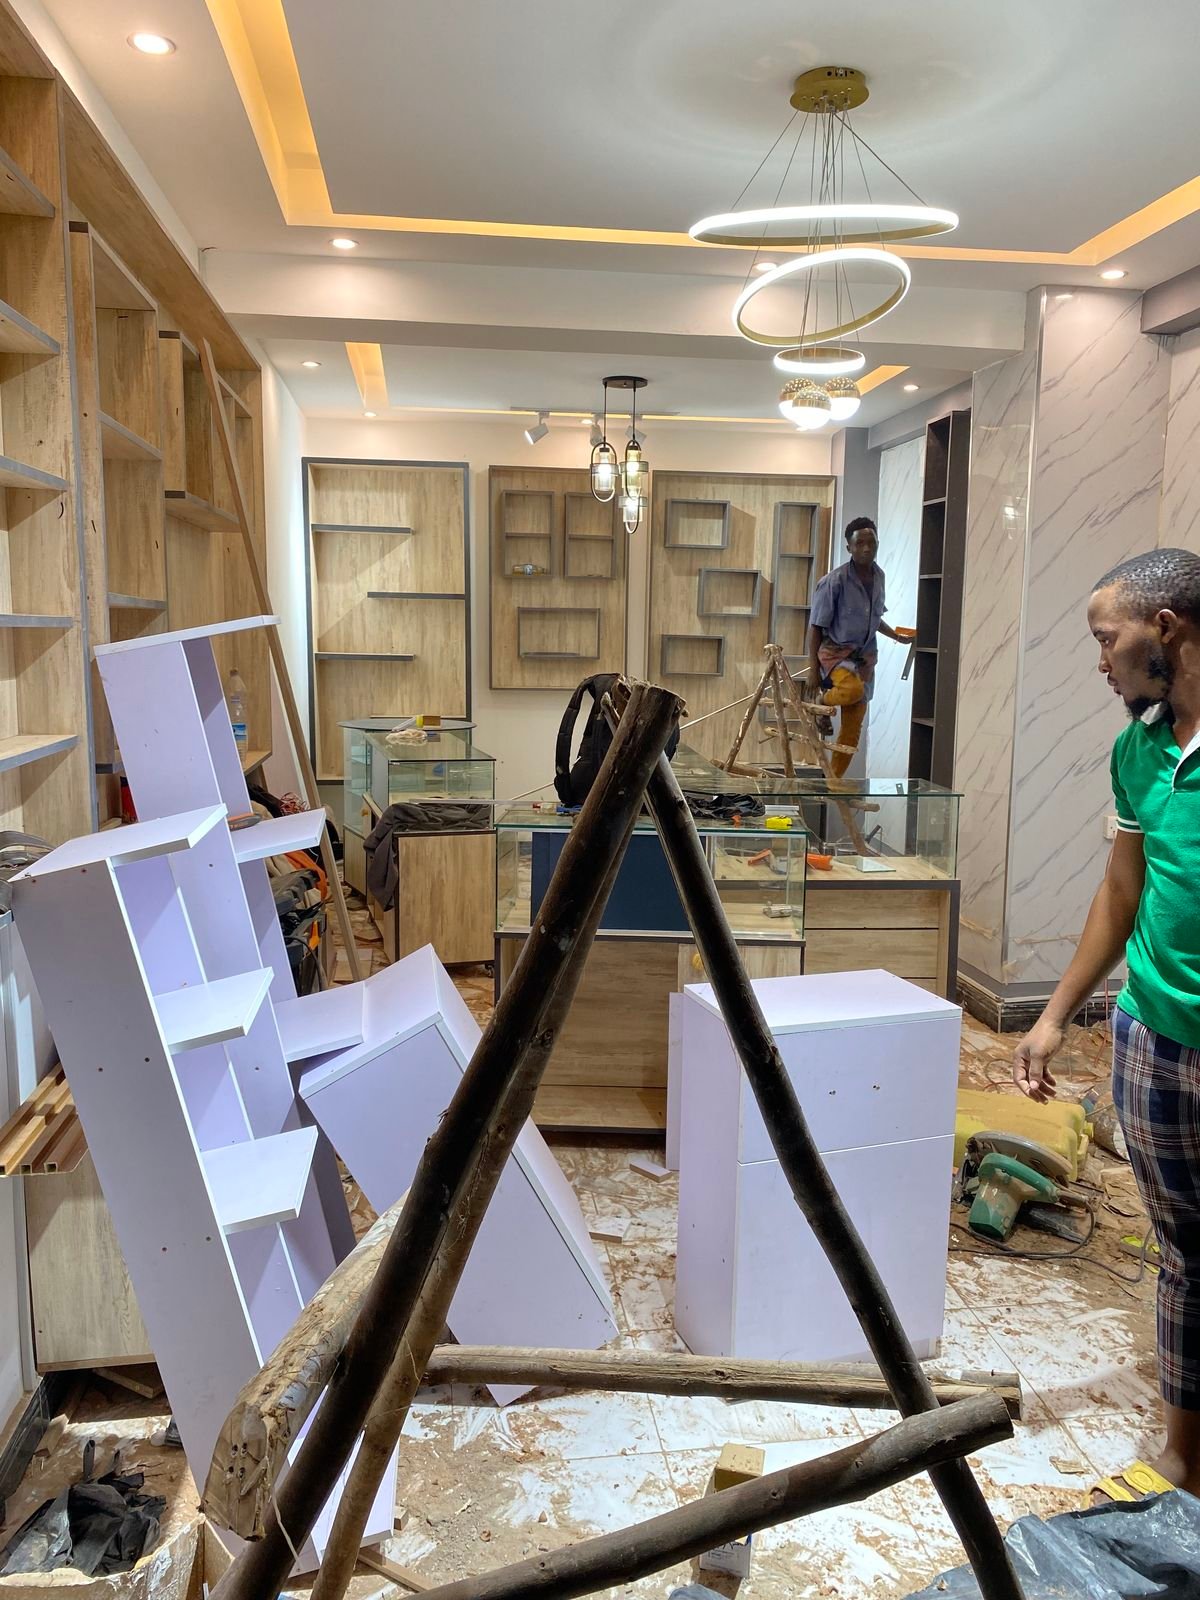
8. Tray Ceiling with a Central Pendant Light
A central pendant can become the main visual feature of a tray ceiling. This is particularly effective over a dining table or in a living room where the furniture arrangement creates a clear focal point.
The tray frames the light fitting, giving it more visual importance without the need for extensive decoration.
Best for: Dining rooms, living rooms, lounges and selected bedrooms.
Design tip: Make sure the fitting’s size suits both the tray and the room. Heavy fittings may require additional support beyond the gypsum board itself.
9. Tray Gypsum Ceiling with Decorative Cornices
Cornices add a decorative transition between the ceiling and the wall. When incorporated into a tray design, they can create a more traditional or formal finish.
The amount of decoration can vary from a simple narrow profile to a more detailed moulding.
Best for: Classic homes, formal living rooms, dining rooms and selected luxury interiors.
Design tip: Choose a profile that works with the room’s dimensions and other finishes. Oversized mouldings can make smaller rooms feel visually crowded.
10. Minimalist Tray Ceiling with a Plain Finish
A minimalist tray ceiling relies on clean lines, a smooth surface and limited decorative detail. It may use one neutral paint colour, a subtle contrasting border or a carefully selected lighting arrangement.
This option offers the depth of a tray without the visual weight of elaborate mouldings.
Best for: Contemporary homes, apartments, modern offices and understated interiors.
Design tip: Give attention to the quality of the finishing. Smooth joints, consistent paint and accurately aligned edges are especially important in simple designs because small defects are easier to notice.
11. Tray Ceiling with Contrasting Paint
Painting the central recess in a slightly different shade can emphasise the ceiling’s shape. The contrast may be subtle, such as two related neutral colours, or more pronounced in a carefully planned interior.
This approach adds visual interest without necessarily requiring more gypsum layers.
Best for: Living rooms, bedrooms, dining rooms and creative commercial spaces.
Design tip: Test colour samples under the room’s actual lighting. A colour that looks attractive on a small sample may appear different across a large ceiling surface.
12. Tray Ceiling with a Decorative Central Feature
A tray can incorporate a small central medallion or another suitable decorative element around a light fitting. This creates a focal point while maintaining the overall framed design.
The decorative feature should complement the tray rather than compete with it.
Best for: Formal dining rooms, traditional living rooms and selected master bedrooms.
Design tip: Keep the feature in proportion to the centre panel. Elaborate decoration is not necessary for every tray ceiling.
Tray Gypsum Ceiling Designs for Different Rooms
A design that works in a large sitting room may not suit a compact bedroom. Consider the purpose and dimensions of each space before choosing your ceiling.
Tray gypsum ceilings for living rooms
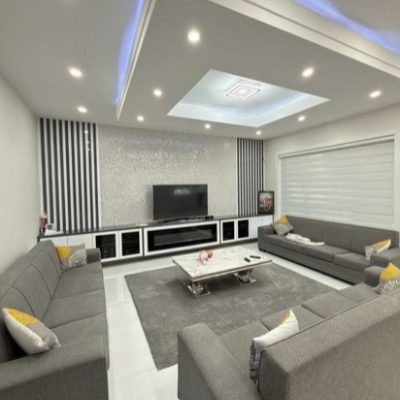
Living rooms are often a suitable location for a tray ceiling because the ceiling can frame the main seating arrangement and act as a visual feature.
A single rectangular tray with concealed LED lighting can create a refined contemporary look. Larger rooms may accommodate a double tray, provided the design does not overwhelm the furniture or reduce the room’s sense of space.
For open-plan layouts, position the tray to suit the sitting area rather than automatically extending it across every connected space.
Tray gypsum ceilings for master bedrooms
A tray can make a master bedroom feel more considered without filling the ceiling with elaborate shapes. Some designs place the main feature above the bed, while others use a centred tray that follows the room’s proportions.
Concealed lighting can provide a softer atmosphere, while separate bedside lights support reading and other activities.
For a more restrained finish, use one tray level, a simple paint scheme and limited decorative detail.
Tray gypsum ceilings for dining rooms
A square or rectangular tray can visually frame a dining table. A pendant light placed in the correct position can complete the arrangement.
The ceiling should relate to the table’s size and location. Otherwise, the tray and light may appear off-centre even if the ceiling itself is well constructed.
Tray gypsum ceilings for apartments
Apartments may benefit from shallow tray designs that add definition without taking up excessive headroom. A single tray with a simple edge detail is often easier to accommodate than a complex multi-level ceiling.
Before approving the design, establish the existing slab height, the required clearance for fittings and the available space for concealed services.
Tray gypsum ceilings for offices
In an office, a tray ceiling can help define a reception area, meeting room or management office. However, lighting, ventilation, smoke detection, wiring and access to building services must be coordinated.
A simple tray with clean lines may be more appropriate than a decorative residential design, particularly where the office needs a professional and functional appearance.
For wider workplace improvements, explore commercial interior design services.
Cost of Tray Gypsum Ceiling Designs in Kenya
The cost of tray gypsum ceiling designs in Kenya depends on the ceiling area, the number of levels, framing requirements, board specifications, lighting arrangements and finishing work.
SUIMAS provides the following indicative gypsum ceiling planning rates. Tray ceilings should be priced according to their actual design rather than treated as a single fixed-price category.
| Ceiling specification | Indicative planning rate |
|---|---|
| Plain gypsum ceiling for comparison | KES 1,000–1,500 per m² |
| Simple modern ceiling design | KES 1,500–2,500 per m² |
| Stepped or bulkhead detailing | KES 2,000–3,500+ per m² |
| Tray or feature ceiling with cove lighting, depending on scope | KES 2,500–4,500+ per m² |
| Complex premium ceiling designs | KES 4,000–6,000+ per m² |
These are indicative planning rates based on the SUIMAS gypsum ceiling installation cost guide. They are not fixed tray-ceiling quotations. The final price depends on the agreed specification, site conditions, electrical requirements and items included.
Example: Budgeting for a 20 m² tray ceiling
Suppose your living room has a ceiling area of 20 m² and you are considering a tray design.
Using a planning rate of KES 2,500–4,500 per m² gives the following illustration:
- At KES 2,500 per m²: KES 50,000
- At KES 3,500 per m²: KES 70,000
- At KES 4,500 per m²: KES 90,000
This is a mathematical budgeting example, not a confirmed quote. A simple tray may cost less than an elaborate design, while a complex double tray, premium finish or extensive lighting arrangement may cost more.
What affects the price of a tray ceiling?
Number of levels: A single tray generally needs less detailing than a double tray or a more elaborate arrangement.
Shape and dimensions: Straight rectangular designs may be simpler to set out than complex curves, irregular shapes or layouts with many corners.
Lighting requirements: LED strips, drivers, recessed spotlights, pendant fittings, wiring and related electrical work can change the total budget.
Materials and framework: Board specification, the supporting system, fixings and installation method affect both cost and the quality of the finished ceiling.
Painting and finishing: Jointing, skimming, sanding, primer, paint and decorative trim may be included or priced separately.
Existing site conditions: Ceiling height, access restrictions, damaged surfaces and the need to coordinate other building services can add work.
Transport and location: Travel distance, site access and project logistics can affect the overall quotation.
What should a tray ceiling quotation include?
Ask the contractor to specify whether the quoted price covers:
- Gypsum boards, supporting framework and fixings.
- Tray framing and the number of levels included.
- Jointing, skimming and sanding.
- Painting and the agreed number of coats.
- LED channels, LED strips, drivers and electrical fittings, where applicable.
- Electrical labour and wiring modifications.
- Access panels and protection of existing finishes.
- Transport, waste removal and any applicable taxes.
This breakdown helps you compare like-for-like quotations rather than selecting a contractor simply because the initial rate looks lower.
How to Choose the Right Tray Gypsum Ceiling
Before approving the final design, consider these practical points.
1. Check the ceiling height
Tray designs introduce different ceiling levels, so confirm how much headroom the finished installation will use. A shallow single tray may be appropriate for a room with limited height, while a deeper design needs more careful assessment.
2. Match the tray to the room shape
Rectangular trays often suit elongated rooms, while square trays can work well in balanced spaces. Choose the layout according to the room’s proportions and intended furniture arrangement.
3. Decide on lighting early
Do not wait until the gypsum boards are installed to determine the lighting plan. Identify the lights, switches, wiring routes and concealed components during the design stage.
4. Set a budget for the complete finish
Consider the ceiling, lighting, electrical work and painting together. This helps avoid a situation where the design is complete but important finishing items are missing from the budget.
5. Coordinate with other interior finishes
The ceiling should complement the flooring, wall colours, doors, furniture and window treatments.
For complete interior planning, you can explore floor installation services and professional building painting services.
6. Plan for maintenance
Concealed lighting and other services may require future inspection or replacement. Design the ceiling so that necessary access is available without damaging large areas of the finished surface.
Common Tray Ceiling Installation Mistakes to Avoid
Even a simple tray ceiling can look poor if the layout and installation are not properly planned.
Over-designing a small room: Multiple borders, deep levels and too many fittings can make the ceiling look crowded.
Ignoring the available height: A deep tray may leave insufficient headroom in a low room.
Planning lighting too late: Incorrectly positioned channels and cut-outs can disrupt the symmetry of the finished ceiling.
Using poor framing or fixings: The supporting framework must suit the ceiling design and installation conditions.
Rushing the joint finishing: Visible joints, uneven sanding and inconsistent painting are especially noticeable on a ceiling.
Ignoring moisture problems: Repair roof leaks and persistent dampness before installing gypsum boards. Use materials suited to the actual environment.
Failing to coordinate electrical work: Wiring and fitting locations should be planned before the ceiling is closed, and electrical work should be carried out safely by suitably qualified personnel.
Tray Gypsum Ceiling Installation Process
A well-managed installation follows a sequence that connects the design with the technical work.
Step 1: Site assessment and measurements
The team measures the ceiling area, checks the available height and reviews the existing structure and service routes.
Step 2: Design selection
You agree on the tray’s shape, dimensions, number of levels, lighting details and finish.
Step 3: Quotation and specification
The contractor documents the work, materials, labour, lighting responsibilities and finishing items included in the price.
Step 4: Framework installation
The installer sets out and fixes the supporting framework according to the approved design and suitable installation requirements.
Step 5: Electrical coordination
The team coordinates lighting positions, wiring and access requirements before closing the ceiling.
Step 6: Gypsum board installation
The boards are measured, cut and fixed to form the tray and its surrounding levels.
Step 7: Jointing and finishing
The joints and fixings are treated, and the surface is prepared for painting. Edges and recesses should be checked for alignment.
Step 8: Painting and lighting installation
The approved paint finish is applied, and the specified lighting components are installed.
Step 9: Inspection and handover
The finished ceiling is checked for visible defects, uneven edges, paint inconsistencies, lighting issues and outstanding work.
The project duration depends on the design, room size, site conditions, drying times and scope of work.
Why Work with SUIMAS Interior Designers?
The quality of a tray gypsum ceiling depends on the design as much as the materials and installation. Accurate measurements, suitable framing, well-planned lighting and careful finishing all influence the final appearance.
SUIMAS helps clients plan ceiling installations according to their space, style preferences and budgets. We can also coordinate ceiling work with other interior finishes where the project requires a broader approach.
Explore our gypsum ceiling design options, gypsum ceiling installation services and 3D design and layout planning.
For wider projects, these specialist services may also be useful:
- Interior design services for coordinating ceiling designs with complete room layouts.
- Interior finishes for complementary surface and finishing selections.
- Renovation services for ceiling upgrades within wider property renovations.
- Aluminium solutions for related architectural and interior applications.
- Commercial kitchen solutions for commercial and hospitality projects requiring coordinated interior planning.
Where required, ceiling work can also be planned alongside building and construction services.
Areas We Serve
SUIMAS accepts project enquiries from clients across Kenya, subject to project scope, site assessment and availability. Our service coverage includes Nairobi, Kiambu, Nakuru, Mombasa, Kisumu, Uasin Gishu, Machakos, Kajiado, Kilifi, Nyeri, Meru, Kakamega, Bungoma, Kericho, Laikipia, Narok, Nandi, Baringo, Samburu, Turkana, West Pokot, Elgeyo-Marakwet, Trans Nzoia, Busia, Siaya, Homa Bay, Migori, Kisii, Nyamira, Vihiga, Kirinyaga, Murang’a, Nyandarua, Embu, Tharaka-Nithi, Kitui, Makueni, Taita-Taveta, Kwale, Tana River, Lamu, Garissa, Wajir, Mandera, Marsabit and Isiolo.
In Nairobi, project enquiries may come from Karen, Runda, Lavington, Kileleshwa, Kilimani, Westlands, Parklands, South B, South C, Lang’ata, Ruaka, Ruiru, Thika Road, Syokimau and Kitengela. In Mombasa and the Coast region, enquiries may include Nyali, Bamburi, Shanzu, Diani, Kilifi and Malindi.
Contact our team to confirm availability and any site assessment or transport arrangements for your location.
Request a Tray Gypsum Ceiling Quotation
Ready to upgrade your living room, bedroom, apartment or commercial property with a tray gypsum ceiling? SUIMAS Interior Designers can help you assess your space, compare design options and plan a ceiling finish that suits your requirements.
When requesting a quotation, share your location, approximate ceiling measurements, preferred tray design, lighting requirements and whether you need painting or electrical work included.
Contact SUIMAS Interior Designers:
- Request a quotation: https://suimas.co.ke/contact/
- Website: https://suimas.co.ke/
- Email: info@suimas.co.ke / info@interiordesigners.co.ke
- Phone: 0717 044 443 / 0739 255 050
- Location: Nairobi CBD
Choose a tray gypsum ceiling that enhances your room without compromising headroom, lighting comfort or your budget. With careful planning and professional finishing, a well-designed tray can become a lasting feature of your interior.
Frequently Asked Questions
1. What is a tray gypsum ceiling?
A tray gypsum ceiling has a recessed central section surrounded by a raised or dropped border. The contrast between the centre and the perimeter creates a framed, three-dimensional appearance.
2. How much does a tray gypsum ceiling cost in Kenya?
The cost depends on the design and items included. SUIMAS’s published planning rates range from KES 2,000–3,500+ per m² for stepped or bulkhead designs and KES 2,500–4,500+ per m² for feature ceilings with cove lighting. Complex premium designs may cost more. Obtain a project-specific quotation before budgeting for the final installation.
3. What is the difference between a single-tray and double-tray ceiling?
A single-tray ceiling uses one main recessed section and surrounding border. A double-tray design adds another level or frame, creating more depth and detail. The double tray generally requires more framing, boardwork and finishing.
4. Can I install LED lights in a tray gypsum ceiling?
Yes. A tray can incorporate concealed LED strips, provided the design allows for the lighting channel, wiring, power supply and necessary maintenance access. Plan these details before installing the boards.
5. Is a tray ceiling suitable for a small living room?
It can be, provided the design is proportional to the room. A shallow single tray with a modest border may work better than a deep double tray with many fittings.
6. Does a tray gypsum ceiling reduce ceiling height?
The installation lowers parts of the finished ceiling to create the tray and surrounding levels. The amount depends on the framework, design depth and service requirements. Ask the installer to confirm the finished height before work begins.
7. Which tray ceiling shape is best for a living room?
Rectangular trays often suit elongated living rooms, while square trays can work in more balanced spaces. The best shape depends on the room dimensions, furniture arrangement and preferred lighting.
8. Can I paint a tray gypsum ceiling?
Yes. After appropriate joint treatment and surface preparation, gypsum ceilings can be painted. You can use a single colour or a carefully selected contrasting shade to emphasise the tray’s shape.
9. What causes cracks in gypsum tray ceilings?
Cracks can result from movement, poor framing, unsuitable fixings, inadequate joint treatment or moisture problems. Proper installation and resolving leaks before work begins help reduce these risks.
10. How do I get a quotation from SUIMAS?
Visit the SUIMAS contact page and share your location, ceiling measurements, preferred design and lighting requirements. The quotation should reflect the agreed materials, installation and finishing scope.